In the world of vaping, there is a massive amount of vape juice options to choose from. However, sometimes you find one that is almost the flavor you want but not completely, and that is where making your own e-juice comes in handy. When you make your own vape juice, you get to choose how strong the flavor is, how much cloud production is there, and you get to mix it to your perfect nicotine level — or no nicotine if you’re just here for the out of this world flavors.-- Now you may have thought of this before and then brushed it off because it could be too much work or cost too much money; but the truth is that it doesn’t take long, and it costs less in the long run!
What Do You Need to Make a DIY Vape Juice?
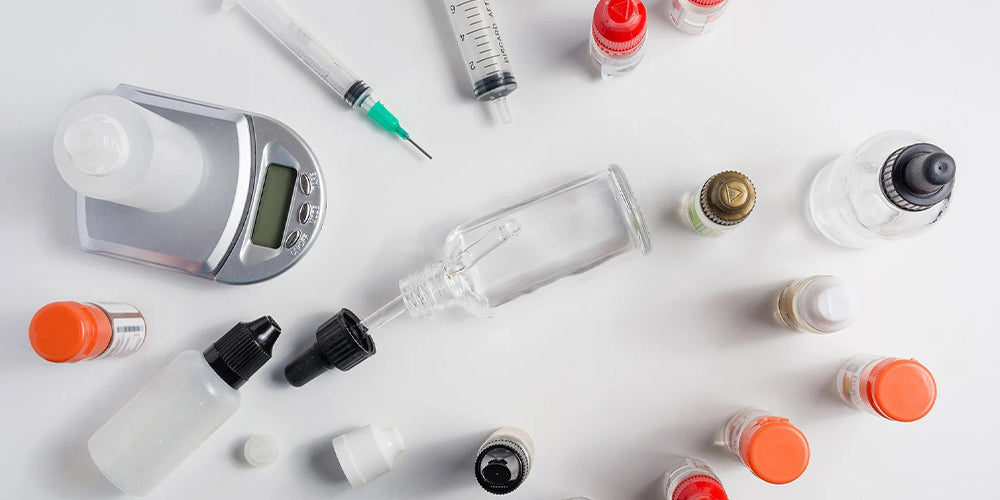
To make your own re-juice you need a few key things to get the processes started, such as
- 100% Vegetable Glycerin (VG): a liquid that is similar to a syrup with a light, sweet taste that makes dense clouds of vapor. Most vape juices use the base of VG, and the higher the percentage of VG creates a vapor cloud that is more than usual and thicker. Typically, it is joint with a percentage of propylene glycol to make an ideal consistency (e.g. 70/30 means 70% vegetable glycerin and 30% propylene glycol)
- 100% Propylene Glycol (PG): a liquid that has about the same consistency of water that gets mixed with the Vegetable Glycerin to reduce how thick and syrup as VG is. It is also used to enhance the flavor and give a “mouth to throat” hit that helps smokers feel like they are still getting their fix.
- Liquid Nicotine (optional): With the liquid nicotine you can mix in, however little or much you would like to meet your ideal nicotine level. If you don’t want any nicotine, you would just replace the amount of liquid nicotine needed with more VG, PG, or flavoring; you can even mix in a mixture of all three to replace it.
- E-Liquid Flavoring: the best part! This gives your vape juice a mouth-watering flavor that keeps you coming back for more. Use one or mix up a few to create an infinite amount of flavor profiles. It usually comes based on propylene glycol.
- Syringes: perfect for accurately adding your flavors and nicotine — once again still optional - and VG/PG for exact measurements of your choice.
- Empty Vape Juice Bottle: so you can store your new creation.
- Cylinders: so you can measure the exact amount of vape juice per bottle
- Gloves (optional): used for if you are handling nicotine so you aren’t exposed to it touching your skin.
- Funnel (optional): this makes for easier filling of bottles and creates less of a mess.
- Beakers are perfect for mixing and can hold any of your liquid ingredients.
Ways to Mix Your Own E-Juice
Now that you’ve gathered all of your supplies, you’ll have to try to test which way you prefer to mix it together. When it comes to DIY e-liquid mixing there are two popular methods: volume mixing or weight mixing. While both of these methods have their pros and cons, completely up to you as the creator and mixer on which way you want to bring your creation together.
If you want to mix by volume, you would then base all the measurements of the ingredients by the volume in milliliters.
If you want to mix by weight, you would base all of your measurements in terms of specific gravity but don’t sweat; it’s a lot easier than it sounds. It breaks down specific gravity means that you’re comparing one liquid’s weight to the weight of pure water and every liquid has its very own specific gravity.
Before we get into how to make the vape juices and the math that goes further into it, we’re going to give you a lay out of the vape juice we will be making in the examples:
|
Start Nicotine: |
48 mg/ml nic. Solution based on PG |
|
Desired Nic. Level: |
3 mg/ml |
|
Desired Volume: |
60ml |
|
Desired Flavor Percentage: |
10% a-liquid flavor |
|
Desired Flavor |
Single Flavor: Blue Raspberry |
|
Desired VG/PG Ratio: |
80/20 or 80% VG/ 20% PG |
E-Liquid Math
Real quick, before we get into how to make your own vape juice, let’s go over the math we will need for it. Yes, there is math included but it’ll be worth it in the end when you’re vaping on your perfectly made vape juice. We do recommend having three separate containers for VG, PG, and nicotine to make your life easier. For the following example we will be using Volumetric Mixing.
Start by choosing what nicotine strength you want your vape juice to be -0 mg,3 mg,6 mg etc. — From there we have to calculate the volume of flavor using the following equation:
Flavor Percentage (%) a desired volume of re-liquid = volume of flavor concentrate needed
Now we have to calculate the amount of PG and VG for the vape juice. We will make a standard 70/30 ratio:
60ml a 0.8 VG (80%) = 42ml of VG needed
60ml a 0.2 PG (20%) = 18ml of PG needed
Don’t start adding your PG yet, because the liquid nicotine and flavoring has a PG base you have to subtract their volumes from the total PG needed to achieve your true ratio blend. For example, we’d do:
12ml PG — 3.75ml of PG based nicotine — 6ml of PG blue raspberry
With that equation you will only need to add 2.25ml of 100% PG for a true 80/20 ratio. Now our ingredients will now match the volumes and percentages below:
|
Ingredients |
Volume (ml) |
% |
|
48 mg PG-based nil |
3.75ml |
6.25% |
|
100% PG |
8.25ml |
2.25% |
|
Blue Raspberry Flavor (PG Based) |
6ml |
10% |
|
100% VG |
48ml |
80% |
|
Total |
60ml |
100% |
How to Make DIY E-Liquid
We have gone over the supplies you’ll need, the calculations and volumes you’ll need, and how you can choose to mix it together so let’s get down to exactly how to make your own re-liquid. —don’t forget your gloves if you’re adding nicotine.--
- Get all of your supplies together on a hard, flat surface that you will have room to work.
- Choose the amount you want to make and get a bottle that size — for the following example we want to make enough to fill a 60ml bottle—
- Combine your ingredients together, the order in which you do so doesn’t matter, we would just recommend using a different syringe with each one so you don’t compromise the rest of your supply of VG with your nicotine or any other mishap compromising that could happen.
- Add the correct volumes that you calculated to the empty vape juice bottle.
- Put the lid on the bottle and shake well to make sure everything is mixed together perfectly. You can also run it under hot water for about 30 seconds or until the liquid is thin if on the thicker side.
After You Have Mixed Your Vape Juice
Throw a quick label on there with details such as your unique name for it, the ratio, strength, and date so you will always know which one you’re vaping. You can also include a batch number if you are planning on trying to tweak the vape juice in any way so you can reference back to which batch you liked the best.
Fresh vape juice does have to be steeped in order to achieve the best flavor. The most recommended way to allow your vape juice to steep is a process called “breathing.” To use this process, simply remove the lid and let the juice breathe, as this allows the alcohol used in many flavors to evaporate, giving you a stronger flavor. Depending on the ratio you use and the flavoring of the juices will need to steep longer. Steeping times range from a few days to a few weeks. Simply test out your vape juice every few days or so to see if it has reached the peak flavor profile you were trying to achieve.
Store your vape juice in a dark cool place away from children or pets as sunlight and oxygen cause nicotine to oxidize and become dark.